Firmware Guide
This guide shows you how to install firmware on a PhobGCC v2.0 board.
What you need
Section titled “What you need”- A computer running Windows, macOS, or Linux.
- A screwdriver for opening your controller. The stock screws are tri-point, but some controllers may be built with Torx or Phillips screws.
- A data-capable micro-USB cable.
Open the controller
Section titled “Open the controller”- Unplug the controller.
- Remove the six screws on the back: at the ends of the handles, near the triggers, and behind the C-stick and D-pad.
- Pull the back shell off and lay it down.
- Carefully lift the board out of the front shell, then place the front shell down.
Download the firmware
Section titled “Download the firmware”Go to the Releases section of the PhobGCC-SW GitHub repository and download the latest firmware. For the v2.0 board, download the .uf2 file.

Save the .uf2 file somewhere you can easily find it.
Flash the firmware
Section titled “Flash the firmware”- Unplug the controller from the adapter or console it’s connected to.
- Plug the micro-USB end of the cable into the board.
- Hold down the button on the front of the board, then plug the cable’s USB-A end into your computer.
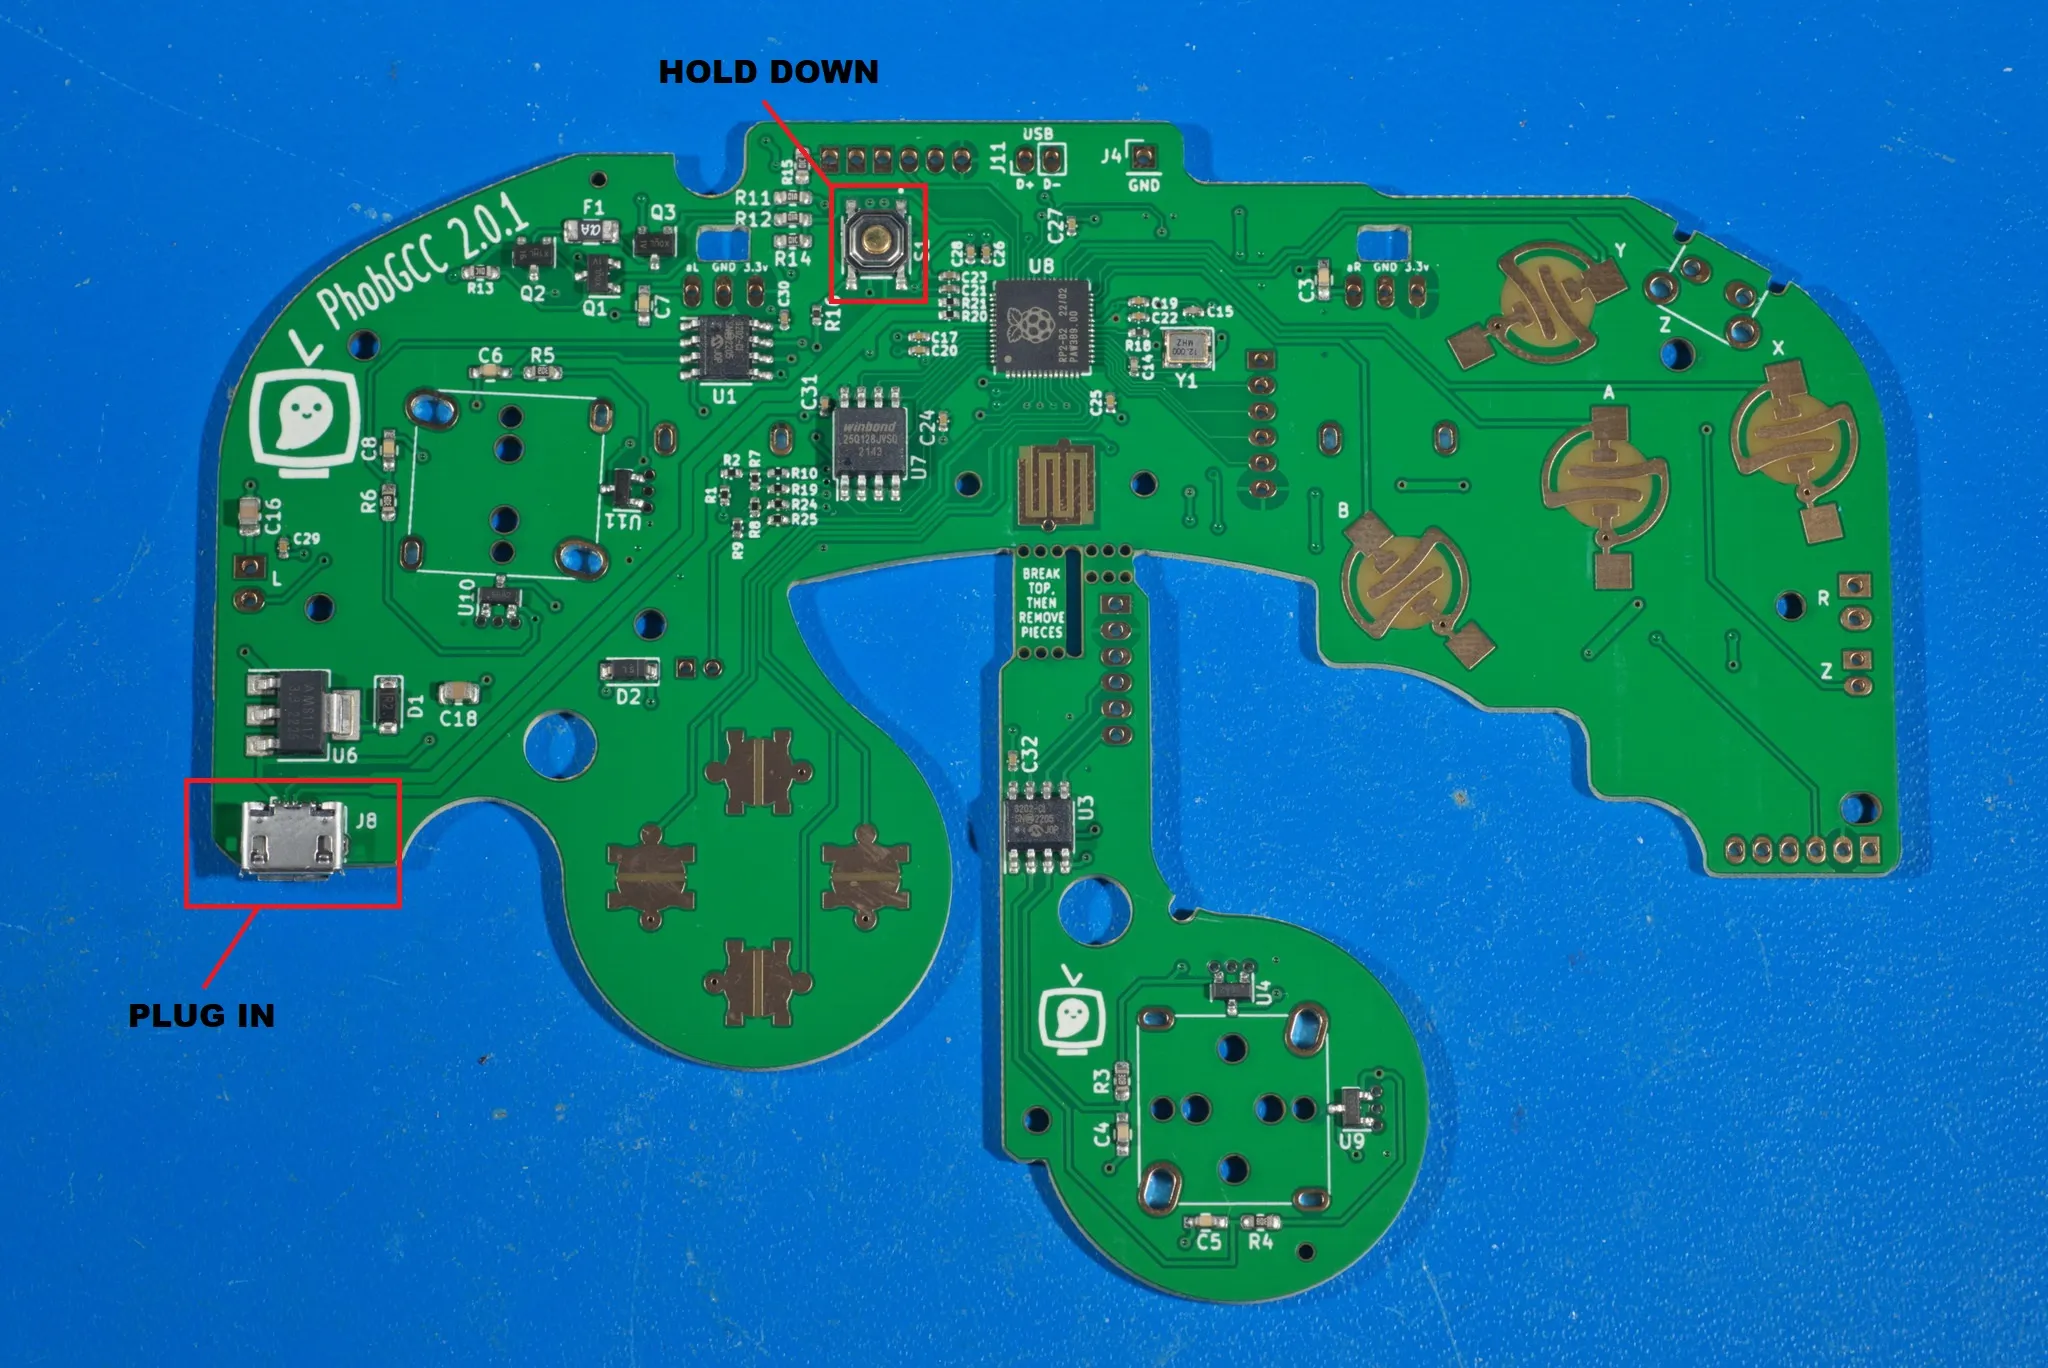
- The controller appears on your computer as a storage device, like a flash drive. Drag the
.uf2file onto it. - When the transfer finishes, the storage device disconnects automatically.
You can now unplug the PhobGCC and reassemble the controller. Then continue to the calibration guide
Troubleshooting
Section titled “Troubleshooting”Controller doesn’t accept any commands
Section titled “Controller doesn’t accept any commands”The board’s memory may contain leftover garbage data that’s interfering with the controller. To clear it:
- Download this reset file.
- Flash it onto your PhobGCC v2.0 the same way as the firmware, and don’t disconnect the micro-USB cable. After about 10 seconds, the controller reconnects as a storage device.
- Flash the normal firmware, then continue with calibration.
Other problems
Section titled “Other problems”For any other issue, ask in the tech support channel on the PhobGCC Discord.
Documentation licensed under CC BY-SA 4.0, adapted from phobgcc.com.