Buying guide
So you want to buy a PhobGCC, but you may not know what to look for, and you may not know how experienced the seller is at making them. We on the PhobGCC team are planning on vetting Phob makers in the hopes that there will be people you can trust, but not everyone making them will be certified. It is an open project, after all.
This is especially important if you’re buying used, since you may not know who assembled it at all.
This guide shows you what to check, ideally before you buy.
Easy things to check
Section titled “Easy things to check”These can be checked without technical knowledge: whether the controller works, and whether it uses the right parts.
Board version
Section titled “Board version”PhobGCC comes in several board revisions, identified by the number after the PhobGCC name. Some are much more common than others. Which version you have affects how you update the firmware.
| Version | How common | Rumble | Hall effect C-stick |
|---|---|---|---|
| 1.0 | Very rare | No | No |
| 1.1 | Somewhat common | No | Yes |
| 1.2 | Wide release (1.2.2) | Yes | Yes |
Version 1.0
Section titled “Version 1.0”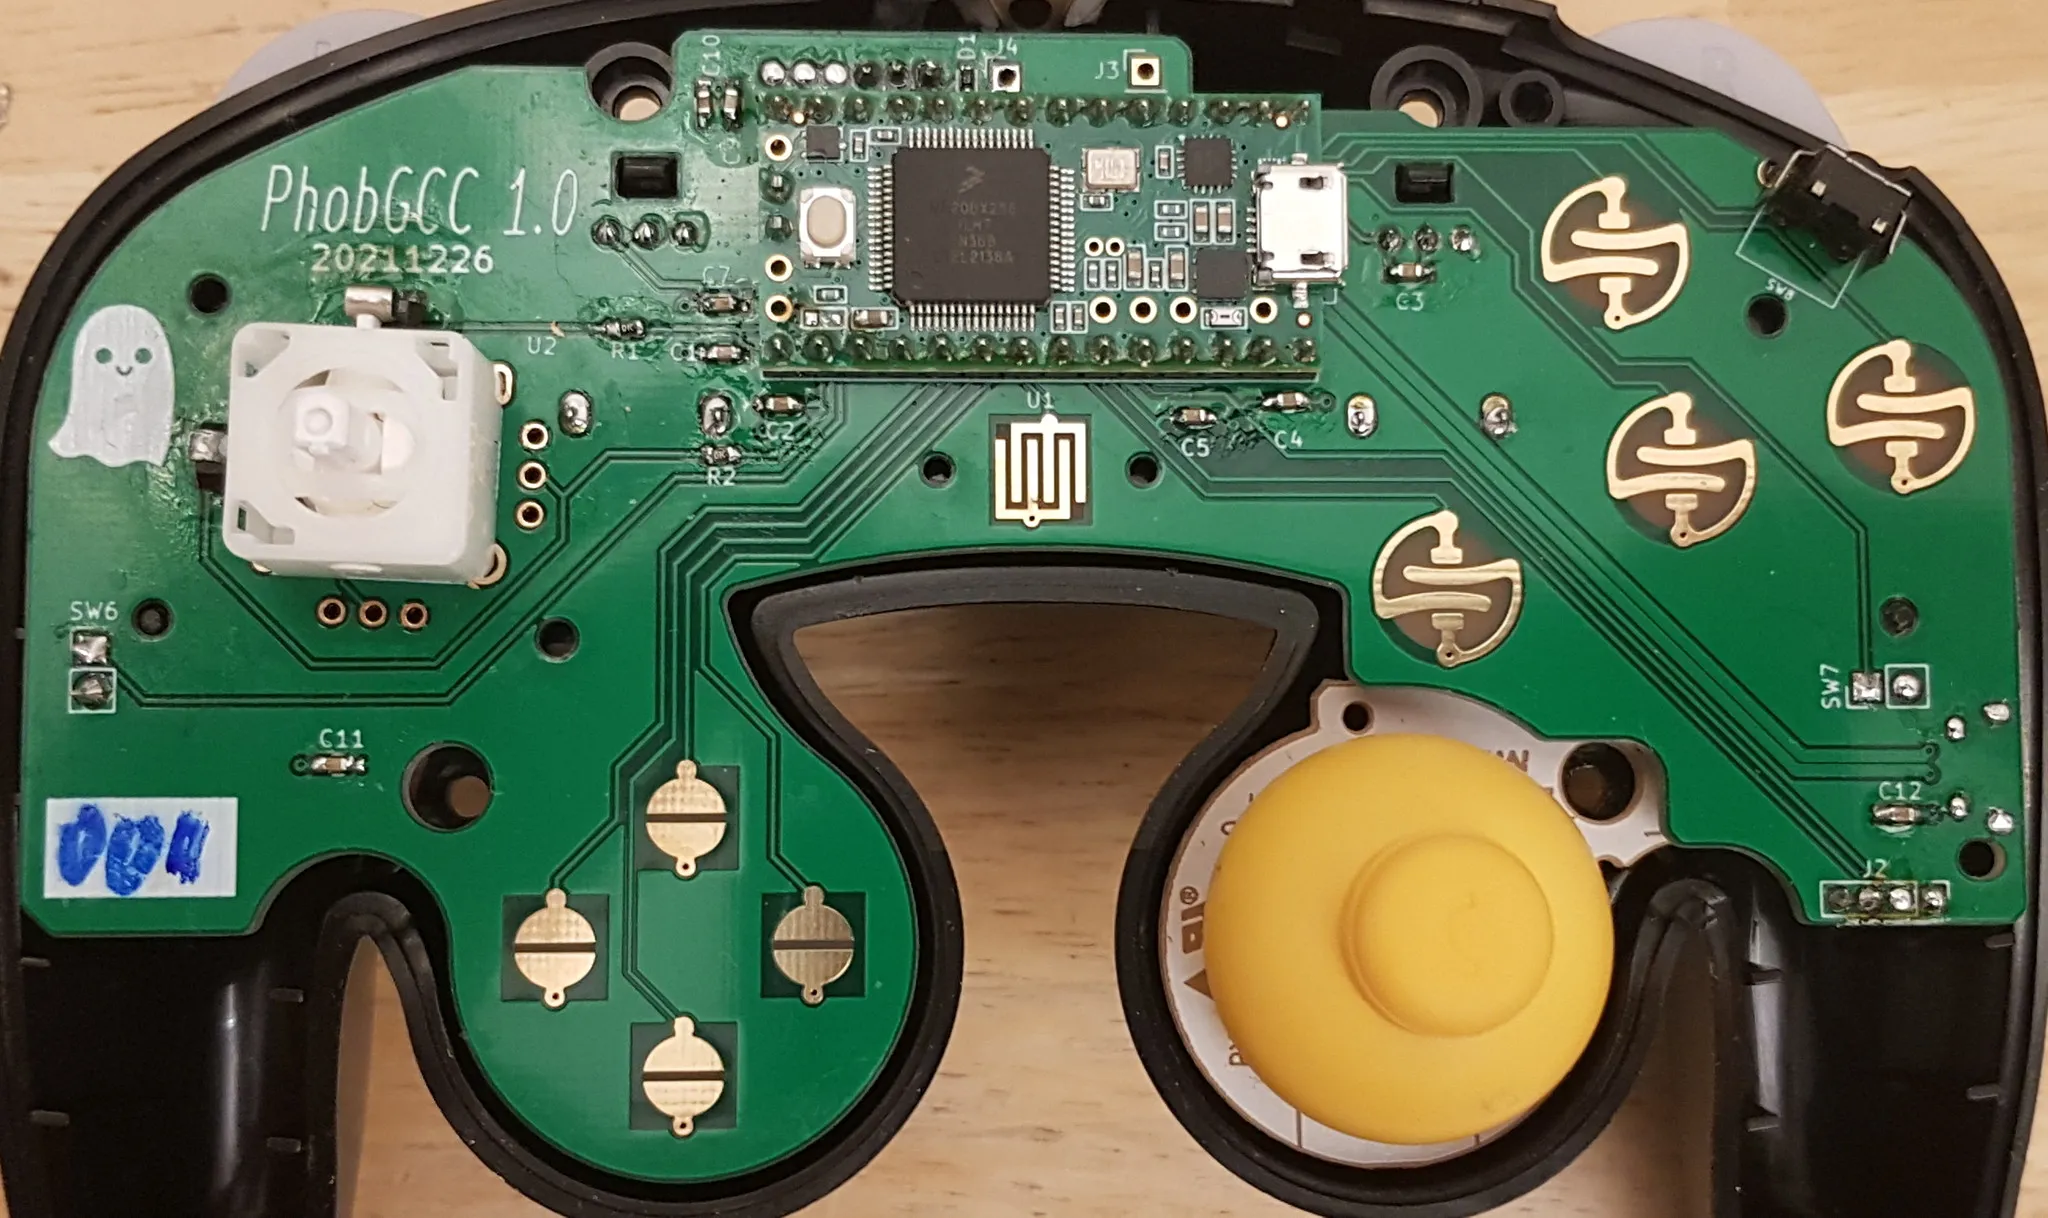
- Very rare.
- Has no rumble.
- Has no support for Hall effect C-sticks.
Version 1.1
Section titled “Version 1.1”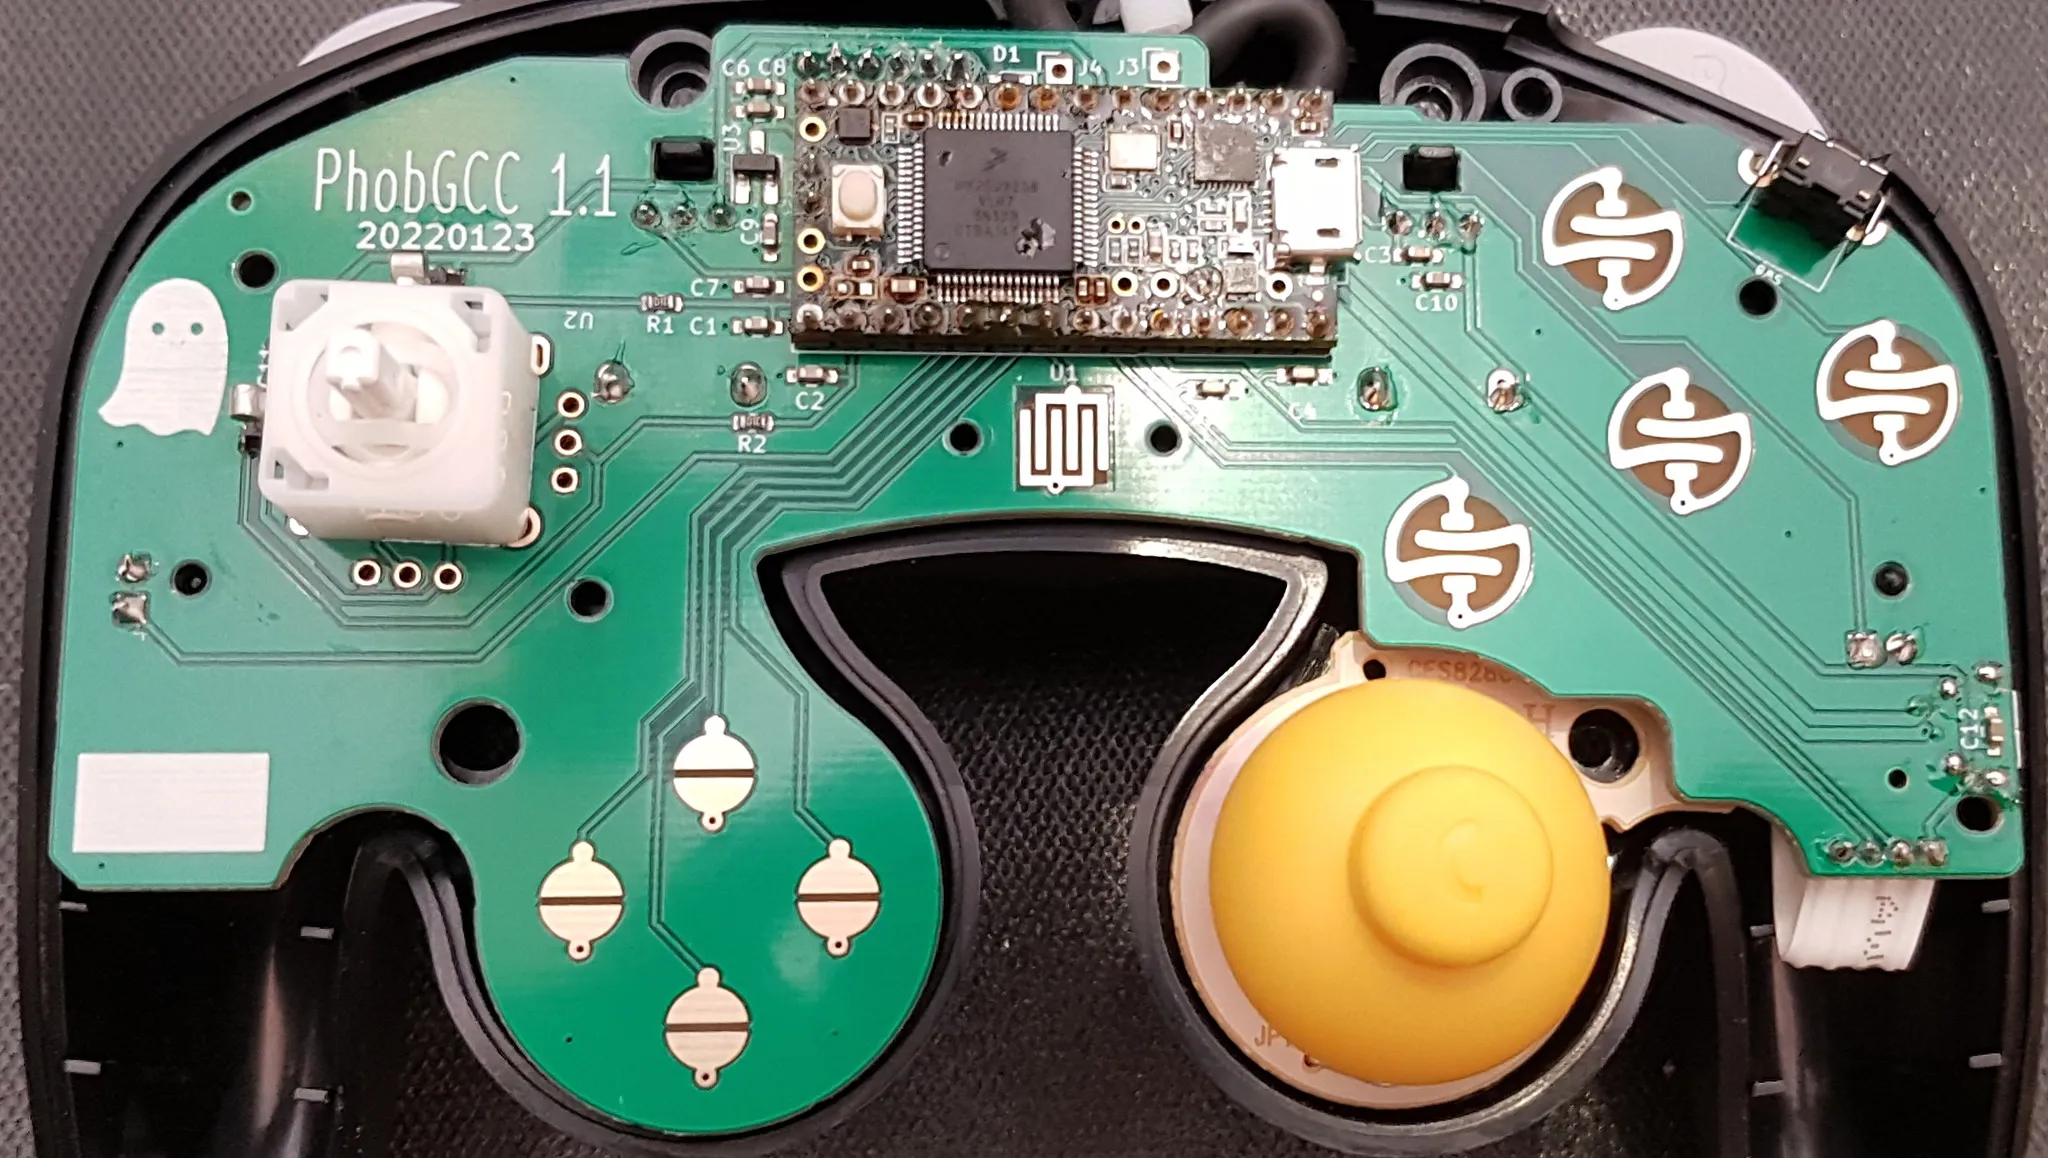
- Somewhat common.
- Has no rumble.
- Supports Hall effect C-sticks. The photo above has a potentiometer C-stick board from an OEM controller, which isn’t desirable.
- Comes in three variants that use the same board, but each needs its own firmware:
- Teensy 3.2: the standard version, where the main chip on the Teensy has many visible legs on all four sides. Not that common due to a Teensy 3.2 shortage.
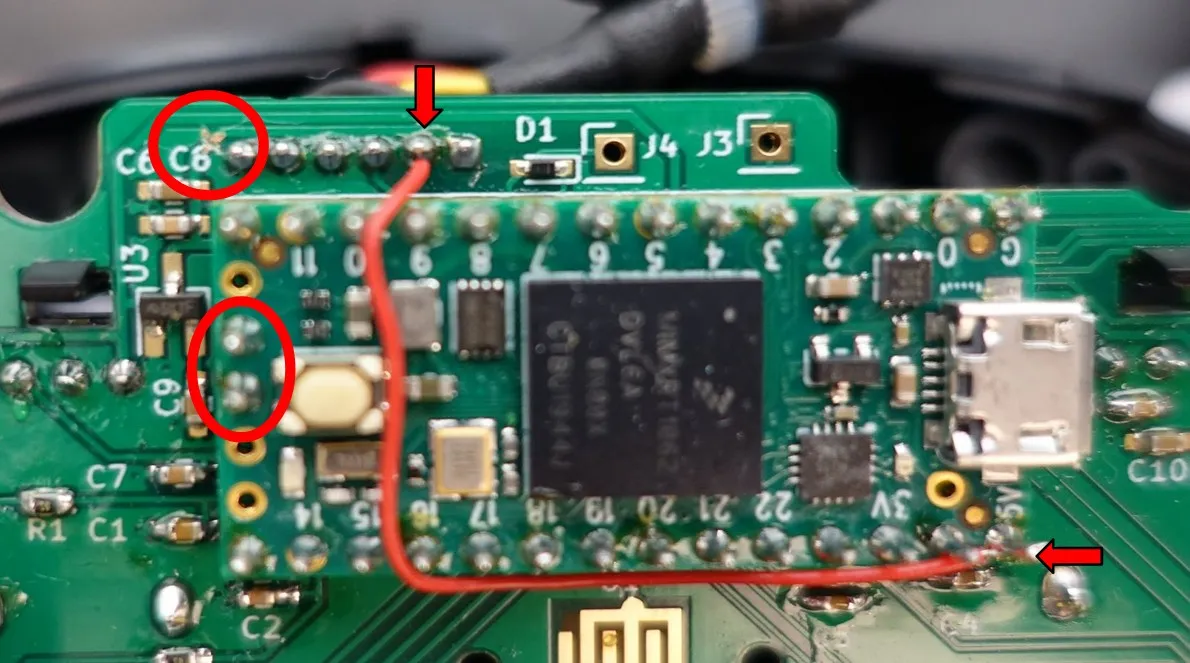
- Teensy 4.0: an alternate microcontroller option that can be distinguished by having no legs. These also have a wire added by hand going across the Teensy board. See the photo below for what a Teensy 4.0 looks like on a PhobGCC 1.1.
- Teensy 4.0 with diode fix: similar to the above, but pins 7 and 8 on the Teensy may be shorted, or the diode next to the connector may be shorted.
Version 1.2
Section titled “Version 1.2”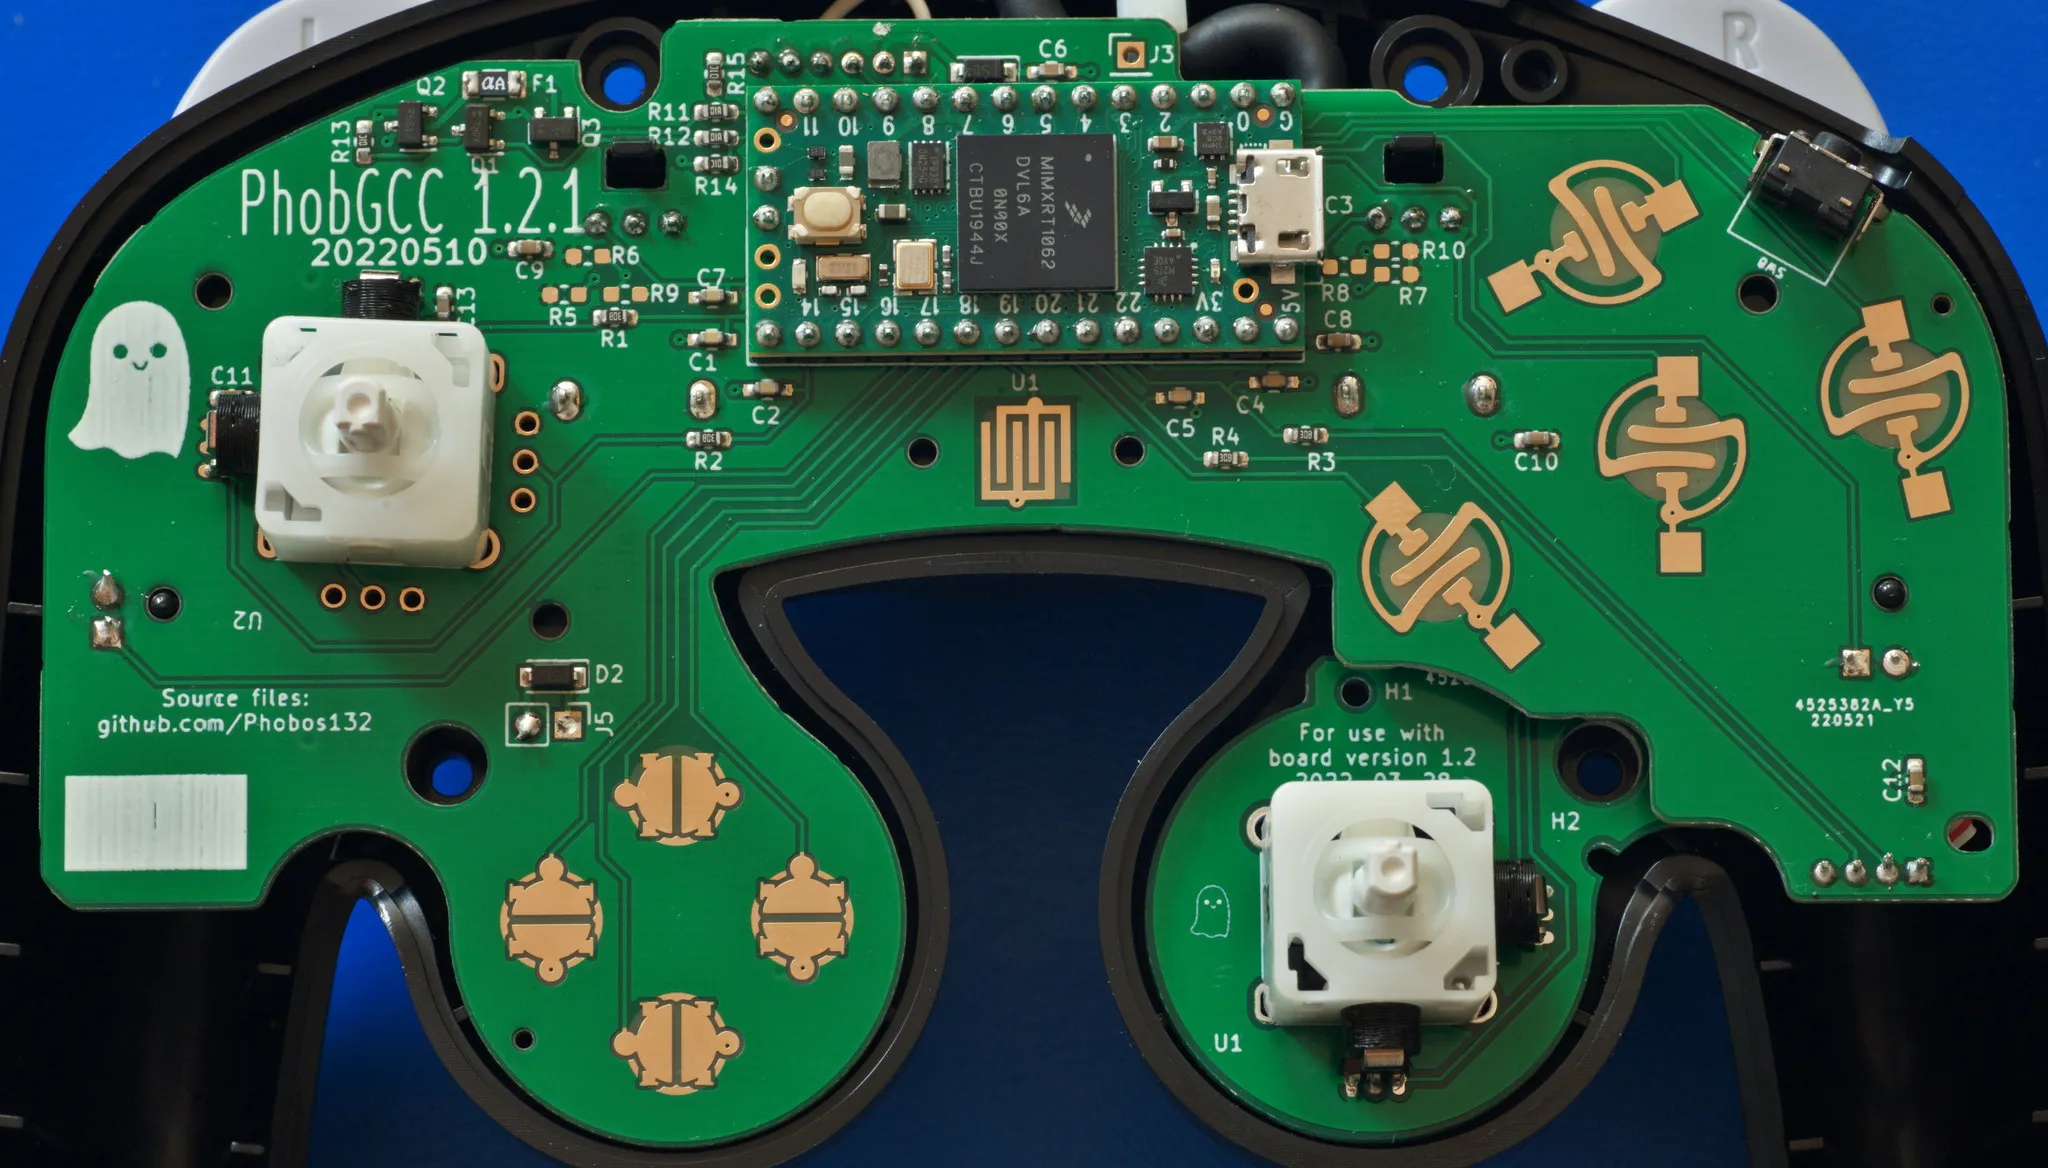
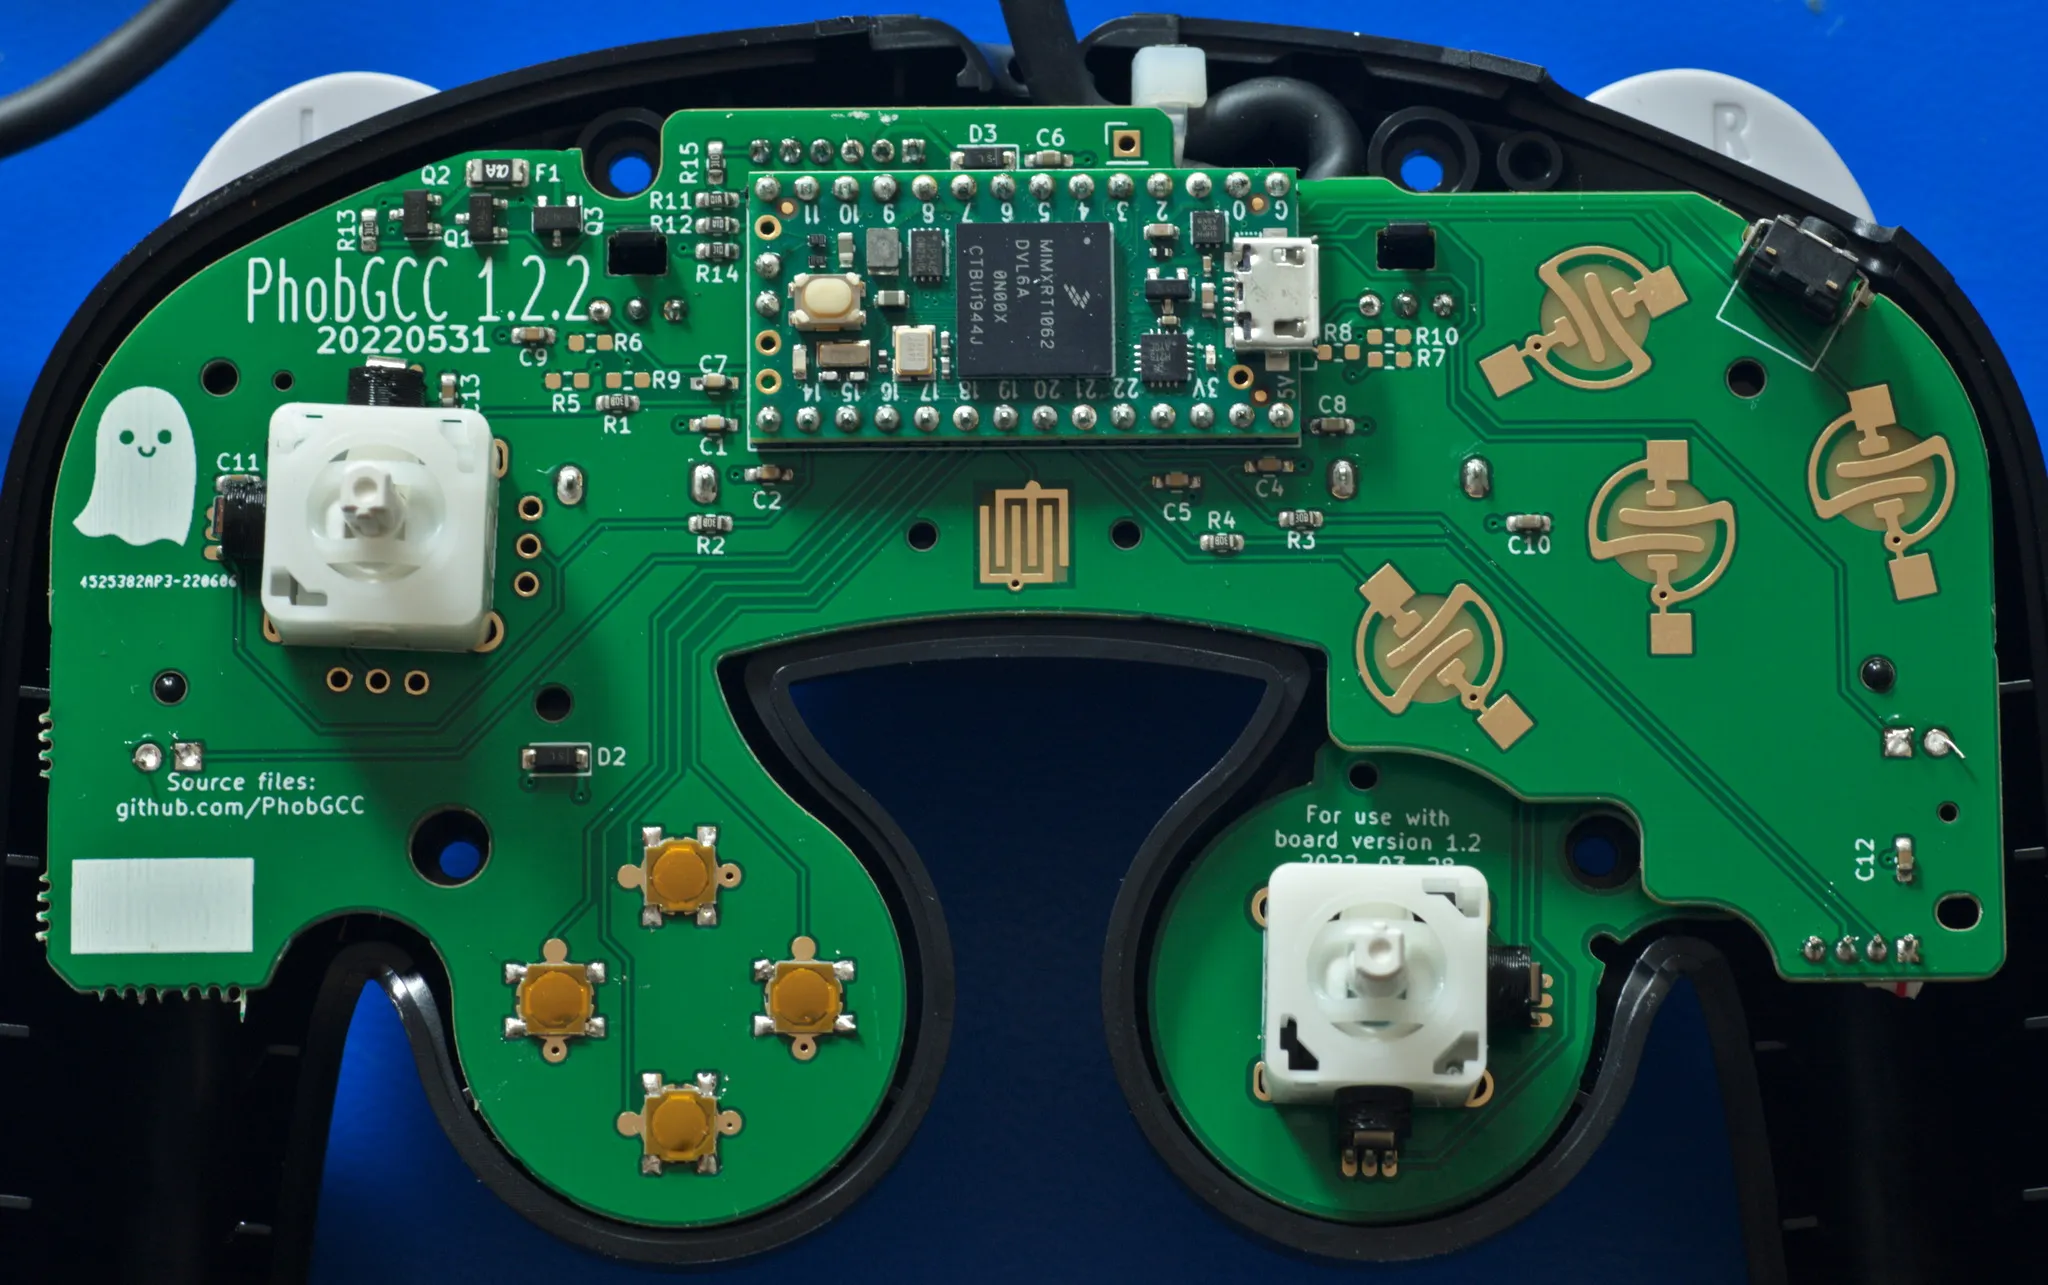
- Has rumble support.
- Has mouse button support on the face buttons other than Start.
- Comes in three variants that share the same firmware:
- 1.2: a handful of prototypes exist.
- 1.2.1: a few resistor and capacitor values were changed. Only a few prototypes exist.
- 1.2.2: wide release. The D-pad, Hall sensor, and rumble motor contacts were changed. The C-stick and mouse-button-supporting L/R paddles come attached to the main board to ensure all Phobs have no OEM C-stick boards.
Functionality
Section titled “Functionality”The controller should work: all buttons, triggers soft and hard (unless explicitly modified to remove soft press), D-pad, and control sticks. If the board is version 1.2 or later, rumble should work too.
The sticks shouldn’t be very noisy or jittery when held off-center, but jitter between two adjacent values is acceptable. Notches should have repeatable coordinates when entered from the same direction, though they may have different coordinates if entered differently (clockwise, counterclockwise, or straight from the center).
The controller should be set up so that it doesn’t have snapback. You can test this in game, but ideally you can run Smashscope on a Wii with a 480i CRT to see graphs.
Stickbox
Section titled “Stickbox”The stickboxes that contain the stick mechanism should be T3, which are entirely white plastic and mounted with two screws on the underside of each.
T1/T2 stickboxes, which have metal frames around plastic innards, are far more prone to wear and becoming loose. They’re also soldered down, which makes them difficult to replace. This effectively limits the lifespan of a PhobGCC.
C-stick board
Section titled “C-stick board”The C-stick board should be a PhobGCC one with magnets, rather than an OEM C-stick board with potentiometers.
While an OEM C-stick can work when new, the PhobGCC isn’t designed to gracefully handle any PODE that develops in the potentiometers, and you’ll get misinputs as the stick wears.
This also limits the lifespan of a PhobGCC, although it isn’t difficult for an experienced Phob maker to fix if they have the parts.
USB cable
Section titled “USB cable”If your PhobGCC came with mouse button switches installed for ABXY, the Y button gets in the way of the USB port on the Teensy. The seller should include a right-angle or 180-degree USB cable that clears the mouse button switches.
Intermediate things to check
Section titled “Intermediate things to check”This is where you start evaluating the quality of the work.
Soldering workmanship
Section titled “Soldering workmanship”Shorts
Section titled “Shorts”There must be no connections between pads that are close together. You should be able to see green completely separating the solder.
Solder joint shininess
Section titled “Solder joint shininess”It’s commonly believed that solder joints are supposed to be shiny, but that mainly applies to leaded solder (Sn63 or Sn60), not lead-free solder (such as SAC305). Most commercial products these days use SAC305 or similar due to regulations, but Sn63 is still often preferred by hobbyists for its ease of use.
Ask your vendor what kind of solder the PhobGCC was made with before judging the joints by how shiny they are.
Solder bonding
Section titled “Solder bonding”All solder joints should have the solder clearly sticking to both the component and the board, to make a strong physical and electrical connection.
Solder quantity
Section titled “Solder quantity”The entire pad on the board should be wet out with solder, but ideally there shouldn’t be enough solder to form a convex ball.
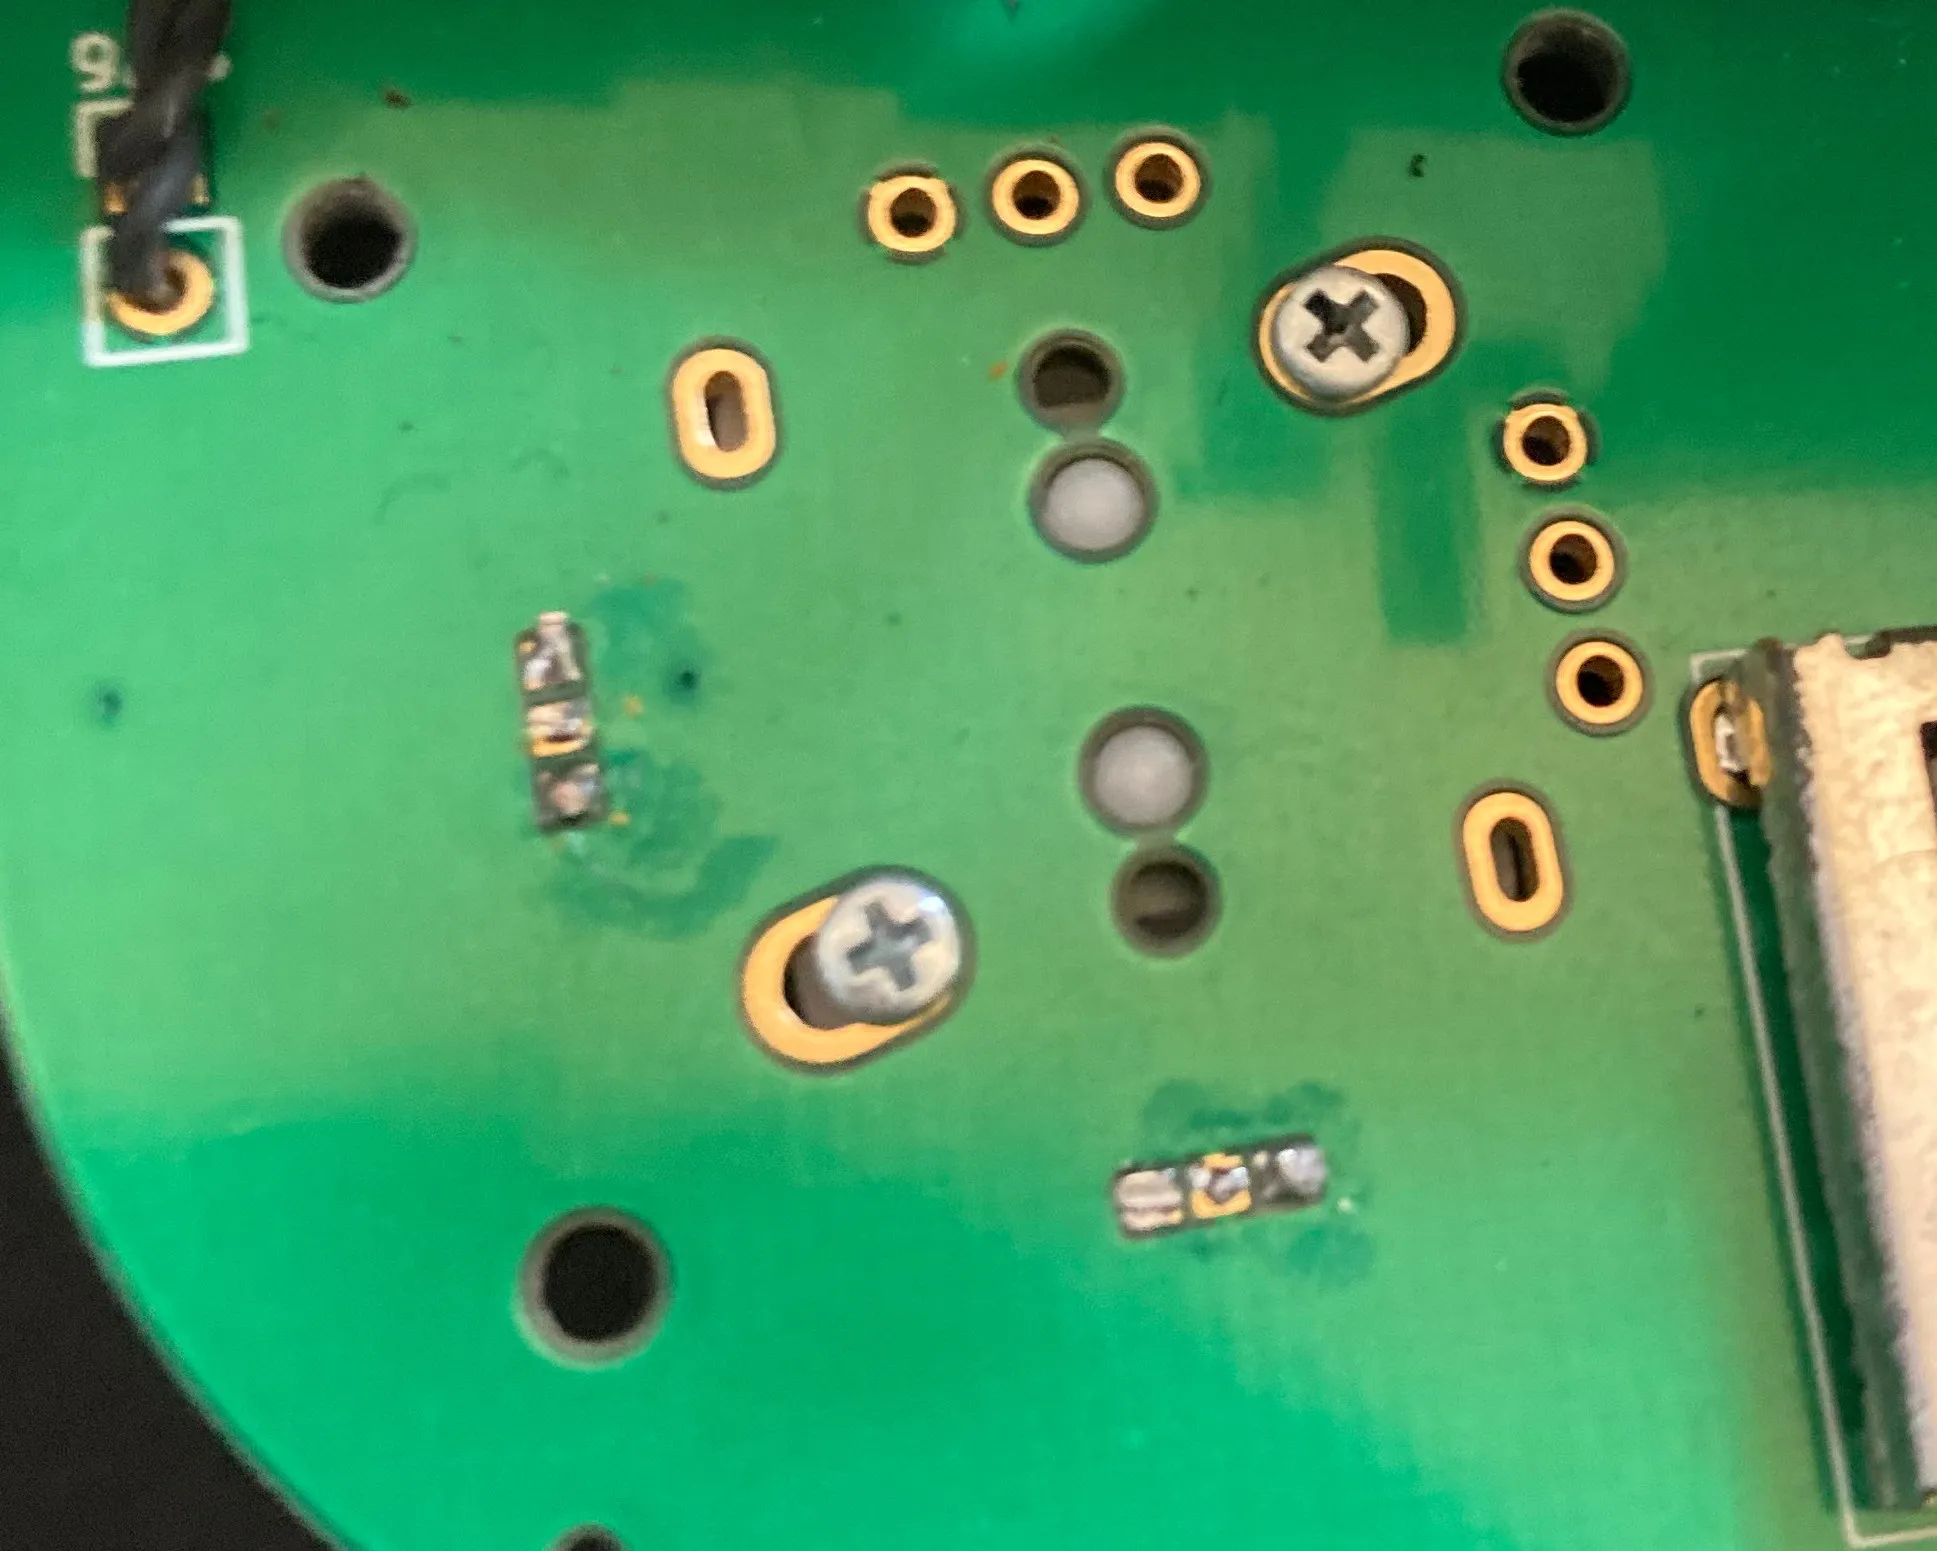
This is an example of a solder joint that has poor contact with the board and caused undesirable stick behavior.
Physical workmanship
Section titled “Physical workmanship”The pins below the Teensy must not stick out below the bottom of the board, or they’ll interfere with the plastic rumble bracket.
Likewise, the solder joints for the Hall effect sensors on the main stick should be cut fairly close to the PCB, or they’ll make it difficult to close the controller.
Documentation licensed under CC BY-SA 4.0, adapted from phobgcc.com.